
Usually this blog is in Hebrew, but this time, since the post is not cloud related and more important very relevant for everybody and not only Hebrew speakers, I've decided to do this post in English. So how did I setup my CrashPlan FreeNAS? Keep on reading.
I always wanted to have a centralized storage at home, for all my Photos, Documents and Media files, so I can share them across all devices on my network. After looking at some options, I've selected FreeNAS as the base for my setup and after finding a used HP ProLiant MicroServer (great little server for Home and SOHO NAS), I've setup my home NAS in few hours of work.
After moving all my data to the new NAS and setting up an external drive for local backups, I have started to look for an offsite backup solution for the system. Since I've been using CrashPlan for years and there is an official plugin for CrashPlan, available for FreeNAS users, I thought my search was ended. I could not be any more wrong than that….
While the install process of the official plugin is very simple and you can get a running CrashPlan in less than 5 min, I had real show stopper with my backup files list, since many of the files and folders I have are using Hebrew names. The CrashPlan UI could not read those files or was messing between folders and files and all sort of weird issues that prevented me from backing up my most valuable assets (mainly photos and music).
Searching the internet for a solution, brought several posts regarding similar issues (not necessarily with Hebrew but with other Non-ASCII languages), all of them mentioning system LOCALE, environment variables and UTF-8 but after playing for hours with the plugin's Jail setup and making sure all settings are UTF-8, I still was not able to make CrashPlan backup my Hebrew folder and files.
Some of the posts I read mentioned that, most likely, this is a FreeBSD related issue and after contacting CrashPlan's support (I have a pro account) and having some email exchange with them, they offered me a full refund for my paid account and admitted they don't plan to support FreeBSD or FreeNAS for Non-ASCII folder and files.
While that was the end of the official CrashPlan plugin path, the fact this is a FreeBSD issue and the discovery (during my research) that there is an option to run not only a FreeBSD jail but a Linux one, I've decided to give it a try (although in theory, technically it doesn't make sense, since all Jails eventually use the same file system).
The first attempt was with the Ubuntu Jail template, which failed miserably, even before the CrashPlan part. The Ubuntu Jail is completely broken and I don't recommend it for anything! it's missing tons of basic settings and binaries and the network is a complete mess. I've spend 2 good days to make it just work and then decided to ditch it and give CentOS a try, which led me to the below process.
Declaimer: This is unofficial and unsupported process. I have no intention to support it, take any responsibility to any outcome or to any case of data lost. Run it on your own risk. I assume CrashPlan team will be able to provide basic support as long as you don't mention this is a FreeBSD jail.
Create a new CentOS Jail
We are starting with the easy part. You click on "Add Jails" under the main Jails menus and make sure you select "centos-6.4" from the Jail type drop-down. I've kept all the other default options as is, as seen in the attached screenshot.

Few seconds later a new jail will be created and added to your available jails list under the main jails menu.
Access your new Jail
When your jail is up and running, access it (SSH to your FreeNAS or use the shell in the web UI) and display the Jails list:
$ jls
JID   IP Address    Hostname     Path
1     192.168.1.63  Linux_COS   /mnt/Data/jails/CrashPlan
The JID is your new jail logical ID (you might see several jails in this list, look for your new CrashPlan jail).
To access the jail run (as root or sudo):
$ jexec 1 /bin/bash
Which should bring up the jail CentOS prompt.
Enable and setup SSH
You will need a working SSH connection to your jail, to connect a CrashPlan client from an external (GUI capable) machine (such as Windows or Mac). SSH is installed on your new Jail but it is not running. Start it using:
$ /etc/init.d/sshd start
Now we need to add your user to ssh users and sudoers, so you can connect to the jail. To add a new user run:
[root@CrashPlan/]$ useradd[root@CrashPlan/]$ passwd Changing password for user . New password:
Type in the new user password and you are done with the account setup. To add this user to the sudoers list, edit the list by:
[root@CrashPlan/]$ vi /etc/sudoers
Add the line '
Install CrashPlan
At this point, we are ready to install CrashPlan. Please take into account the download URL might change. Check https://www.crashplan.com/ for Linux installation instructions. Since the CentOS jail does not have wget by default, I'm starting with installing it and then downloading CrashPlan to a folder inside my jail. I'm adding 'sudo' to all commands in case you are not running as root.
[root@CrashPlan/]$ sudo yum install wget
[root@CrashPlan/]$ sudo wget http://download2.us.code42.com/installs/linux/install/CrashPlan/CrashPlan_3.6.3_Linux.tgz
[root@CrashPlan/]$ sudo tar -xvf CrashPlan_3.6.3_Linux.tgz
[root@CrashPlan/]$ sudo cd CrashPlan-install/
[root@CrashPlan/]$ sudo ./install.sh
[root@CrashPlan/]$ sudo /usr/local/crashplan/bin/CrashPlanEngine status
[root@CrashPlan/]$ sudo /usr/local/crashplan/bin/CrashPlanEngine start
At this point it looks like everything is up and running but if you check status again, you will find out that CrashPlan does not run anymore (it might take few seconds to crash). You need to edit the next file:
[root@CrashPlan/]$ sudo vi /usr/local/crashplan/bin/run.conf
And add the next strings to both lines at the end of each line:
SRV_JAVA_OPTS="… -Djava.nio.channels.spi.SelectorProvider=sun.nio.ch.PollSelectorProvider"
GUI_JAVA_OPTS="… -Djava.nio.channels.spi.SelectorProvider=sun.nio.ch.PollSelectorProvider"
After changing the above, try to run CrashPlan again and check status several times after few seconds.
[root@CrashPlan/]$ sudo /usr/local/crashplan/bin/CrashPlanEngine start
[root@CrashPlan/]$ sudo /usr/local/crashplan/bin/CrashPlanEngine status
The last thing I did on my setup was to make sure CrashPlan is running on boot (although, as you can see below in the know issues, this is not 100% bulletproof).
$ chkconfig --add crashplan
$ chkconfig --list crashplan
crashplan 0:off 1:off 2:on 3:on 4:on 5:on 6:off
Backup setup
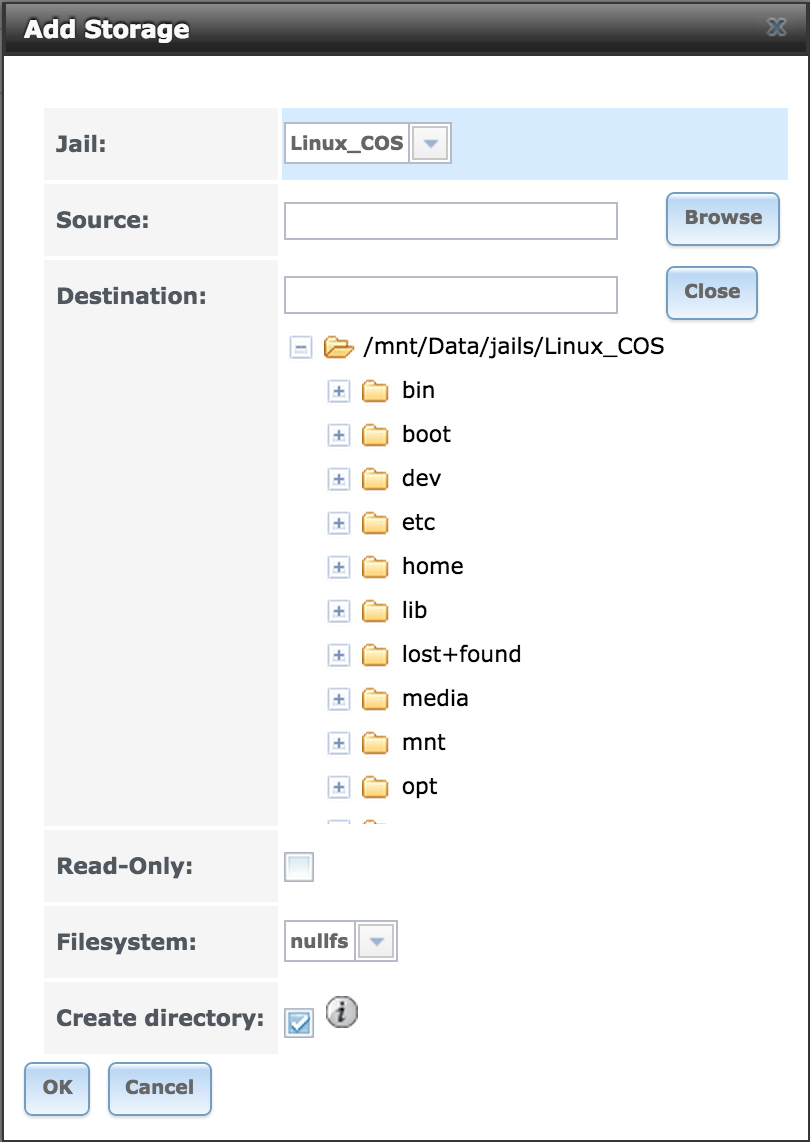
To allow CrashPlan to access your files for backup, you will need to setup file sharing between the main data store and your new CrashPlan jail. This can be done using the FreeNAS UI and it's very simple. You are basically mounting every data store you want to backup using CrashPlan on the jail file system and that way it can access your files on the NAS and backed them up (and it even works with Hebrew and other Non-ASCII languages, which was the purpose of this entire post).
Locate your jail in the list of jails in the main FreeNAS menu, expend the menu and go to the Storage menu item. Select Add Storage and follow the wizard. Usually I don't change any settings in the wizard, except for the source and destinations folders.
Access your jail from CrashPlan Client
Since a running the CrashPlan app does nothing out of the box, the last task is to configure CrashPlan to actually start backing up some data. As you might imagine, there is no way to run the CrashPlan client app on the NAS machine. You will need to install a client on a compute with graphical interface such as Windows or Mac (Linux with GUI such as Ubuntu is also an option but I never tried it). Visit the CrashPlan website to download the latest version of CrashPlan for your OS and install it.
By default the CrashPlan client connects to the local backup agent running on the machine it was installed on. To access and setup a remote machine, follow a process on CrashPlan site called Configuring A Headless Client. When setting up your SSH tunnel to the jail, remember to use the user you have created earlier and the IP of your jail (not the main FreeNAS) as your target (the "Headless" computer).
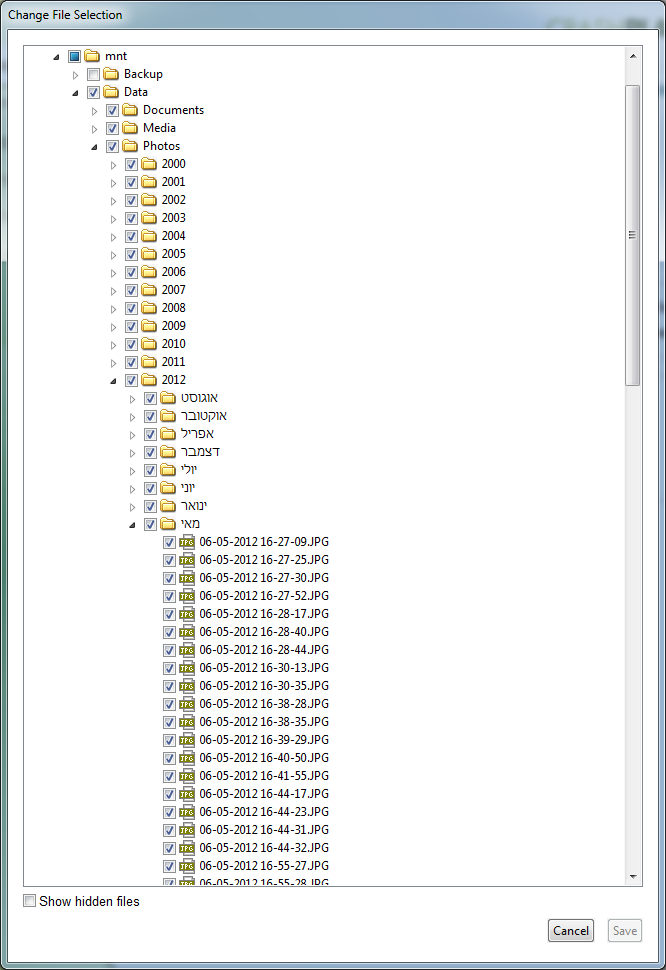
After connecting to your remote CrashPlan server, follow the setup process and select the files for backup, save your settings and you are DONE!. CrashPlan will backup all selected files from now on and will include all files and folders, regardless the language of the file or folder name. You won't need the client anymore at this stage and the only use of it is to play with the server settings once in a while.
Known issues
Sometime sshd won't run after Jail restart or system boot. The best indication for that is when you try to create a tunnel or just SSH to your jail (directly, not using jexex) your terminal connects to the host account of FreeNAS and CrashPlan client refuse to connect. You can restart sshd by running:
$ /etc/init.d/sshd start
In some cases Crashplan might crash or not load automatically. To check CrashPlan status use the CrashPlanEngine script and run it in case it's not running:
$ /usr/local/crashplan/bin/CrashPlanEngine [status|start]
If you run into any new issues, please let me know and I will update the post.